The resistance band full body routine hits every major muscle with one small tool and zero heavy gear.
Picture the snap of elastic tension as you stand, breathe, and push through a move that feels honest and effective. You’ll notice how stabilizers fire and joints stay happy when you control tempo and range.
These bands are portable, cheap, and proven. Coaches and studies show they can match dumbbells for strength while challenging balance and coordination.
What you get: simple set and rep plans, pro cues for clean form, quick warm-ups, and options for a 20- or 40-minute session so you can train anywhere—living room, hotel, or office.
Key Takeaways
- You can build real strength and stability with minimal equipment.
- Constant tension helps recruit stabilizer muscles and reduce joint stress.
- Workouts include clear sets, reps, tempo, and safety checks.
- Two time-efficient formats fit busy schedules: 20 or 40 minutes.
- Small adjustments—length, stance, tempo—keep progress without new gear.
Why resistance bands deliver a powerful full-body workout
Elastic tools keep your muscles working from start to finish, so short sessions actually feel productive.
Constant tension means the load stays active both when you lift and when you lower. That continuous pull taxes concentric and eccentric phases and helps you fatigue target muscles more efficiently.

- Steady tension forces you to control each rep, which fires stabilizers and improves balance.
- Moves like pull-aparts and rows show this: your upper back engages while your core steadies the trunk.
- The elastic load ramps up as you stretch it, so joints avoid heavy stress at vulnerable angles.
| Benefit | How it works | Who it helps |
|---|---|---|
| Joint-friendly loading | Load increases with stretch, not at end range | Beginners and people rehabbing |
| Stabilizer activation | Constant pull demands control and balance | Anyone wanting better posture and core strength |
| Portability & consistency | Easy to progress tempo or tension to build strength | Busy travelers and home trainers |
Choose the right band for your goals and starting point
Not all bands do the same job — match the tool to the goal and save time.
Sheet bands are thin and gentle. Use them for mobility, warm-ups, and rehab. Try shoulder cars, light pull-aparts, or ankle drills to loosen stiff joints.
Loop and mini options for hips and lower work
Loop and mini styles sit above the knees or around the ankles. They cue hip external rotation and build the gluteus medius. Think lateral walks, glute bridges, and step-outs to improve knee tracking.
Tube bands with handles for upper range of motion
Handled tubes let you press, row, and curl through a big range. They are ideal for training the arms, chest, and shoulders. Pick sets with multiple levels so you can progress rows and face pulls.
- Start lighter than you think; shorten to add load.
- Keep two mini bands (light, medium) for glute work.
- Check handle comfort so they don’t slip in your hands.
- For small spaces, one tube and one mini cover most exercises.
| Type | Best for | Example moves |
|---|---|---|
| Sheet | Mobility, rehab | Shoulder cars, light pull-aparts, ankle drills |
| Loop / Mini | Hip stability, glutes | Lateral walk, glute bridge, clamshells |
| Tube with handles | Upper-body strength & range | Overhead press, rows, curls |
Want a quick reference for the best exercises for arms? Check this short guide: best exercises for arms.
Safety, setup, and “make sure” checks before you start
Before you begin, set up a safe training zone. A quick check prevents slips and keeps every rep productive.
Flooring, footwear, and gear inspection
Make sure the floor is clean and smooth. Rough surfaces can nick tubing and shorten a resistance band’s life.
Make sure your shoes grip well so your feet don’t slide when the load increases. Inspect the band for cracks or thinning near attachment points and replace if you see wear.
Tension, grip, and anchors
Set your starting position with a tall chest and braced core before each rep. Use anchors you trust: under your feet, around a heavy table leg, or a door anchor designed for this tool.
- Adjust resistance by shortening the band: choke up with your hands, step wider, or loop it twice.
- If your hands or wrists get sore, use handles or wrap a towel to improve comfort and grip.
- Step back slowly until steady tension, then lock in your stance before you pull band.
- Keep the line of pull predictable; avoid sharp edges that can cut rubber.
| Check | Action | Why it matters |
|---|---|---|
| Floor | Clean, smooth surface | Prevents abrasion and slipping |
| Feet | Supportive shoes with grip | Maintains stable stance under load |
| Band | Inspect for tears; secure anchor | Avoid snaps and unpredictable failure |
Quick warm-up to prime muscles and joints
Start with a short, focused warm-up to wake joints, sync breathing, and lock in good position. Spend 3–5 minutes so you’re moving with intent, not tiring yourself out.
- 3 minutes brisk march in place with arm circles — raises temp and loosens shoulders.
- 10–12 band pull-aparts with a light band to cue upper-back firing and set shoulder position.
- 10 bodyweight squats with knees tracking out slightly to prime hips and knees.
- 8–10 cat-cows on the floor to mobilize the spine and engage the core.
- 10 reverse lunges per side to groove balance and ankle mobility before adding load.
Keep each movement smooth and pain-free. You should feel warmer and more coordinated, not depleted.
| Time | Drill | Purpose |
|---|---|---|
| 3 min | March + arm circles | Raise heart rate, loosen shoulders |
| 2–3 min | Activation drills (pull-aparts, squats) | Prime muscles and position for loading |
| 2 min | Mobility (cat-cows, lunges) | Move joints through range and cue core |
Tip: Breathe through the nose when you can and keep ribs down so the core stays on. Start with a light resistance band for activation, then switch to your working band for the first set.
Upper-body resistance band exercises to build strength
Simple upper-body moves deliver measurable strength gains when you nail the setup. Start each drill with a stable starting position and controlled tempo. Focus on the chest, back, shoulders, and arms rather than speed.
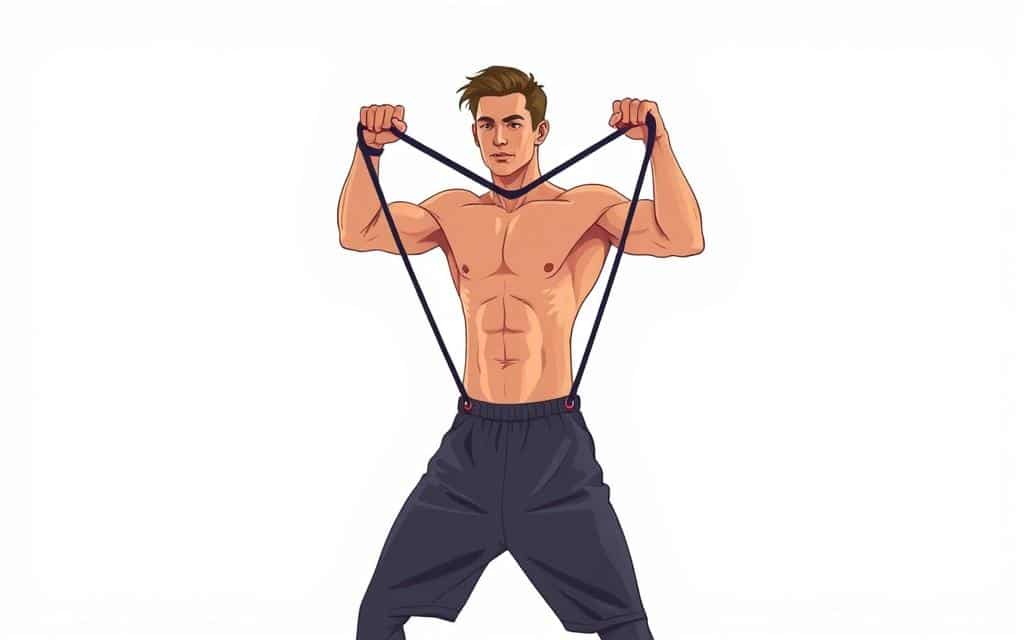
Banded pull-aparts
Set a tall posture, arms straight at shoulder height. Pull the band by squeezing your upper back. Stop when hands reach chest level and return slow.
Common mistake: shrugging the shoulders. Progression: shorten the band to add load.
Bent-over row
Hinge at the hips with a flat back. Feet hip-width, hands even. Drive elbows back and pause to feel the shoulder blades meet.
Common mistake: rounding the spine. Regression: widen feet or reduce range to maintain form.
Overhead press
Brace your core, keep palms in, and press straight overhead. Keep elbows tracking and ribs down. Cue: “biceps by ears.”
Common mistake: arching the lower back. Progress by pausing at peak tension for two seconds.
Curls (regular & reverse)
Elbows tight to the sides. Curl smoothly, then lower slower than you lift. Reverse curl uses an overhand grip to target the forearms. Keep wrists neutral.
Triceps extension & kickback
Tuck elbows and extend without letting the shoulder flare. For kickbacks hinge forward so upper arms stay parallel, then squeeze at the top.
Common mistake: rocking the torso. Regress by reducing range; progress by shortening the band or adding pauses.
- Progress tip: Shorten the band for more load or pause at peak tension to level up.
- Form rule: Aim for clean reps over high reps; if form fails, reduce load and reset position.
| Exercise | Key cue | Common error |
|---|---|---|
| Pull-aparts | Tall start, squeeze upper back | Shrugging shoulders |
| Bent-over row | Hinge, flat back, elbows tight | Rounded spine |
| Overhead press | Core braced, palms in | Lower-back arch |
| Triceps kickback | Elbows tucked, squeeze | Torso rocking |
Lower-body band exercises for legs, glutes, and hips
Targeted lower-body moves build stronger hips and legs while protecting knees with smart setup cues.
Squat with band
Set a clear starting position: feet shoulder-width, chest proud. Sit back first, then bend knees and press the band out slightly so knees track over mid-foot.
Drive up through the heels. Stop just above parallel if your low back starts to tuck.
Hip hinge & banded hip thruster
Push hips back like closing a car door. Keep shins vertical and feel hamstring tension before you stand tall.
For the thruster, place the band over hips and anchor under the feet. Squeeze your glutes hard at the top and lower slow.
Lateral walk and lunges
Lateral band walk: band above the knees or at the ankles. Take small, steady steps to fire the gluteus medius and keep hips level.
Reverse and lateral lunge: step long enough so the front shin stays vertical. Lower until the back knee hovers, then drive through the front heel.
- Keep knees from collapsing: press out on the band each rep to cue the glutes.
- If space is tight, do stationary split squats or in-place lateral shifts for similar stimulus.
- Progress by slowing the eccentric, adding a pause, or shortening the band for more resistance.
| Exercise | Key cue | Why it helps |
|---|---|---|
| Squat | Sit back, press knees out | Protects knees and low back |
| Hip thruster | Squeeze at top | Targets glutes without heavy weight |
| Lateral walk | Small steady steps | Improves hip stability and knee tracking |
Core and glute stabilizers to support every movement
Strong core and stable hips make every lift cleaner and safer—start here. This section focuses on simple, safety-first drills that keep your spine neutral and your hips aligned.
Glute bridge (banded bridge)
Heels under knees, band above knees. Push the floor away and lift in one straight line from shoulders to knees. Press the knees out gently against the band to stop collapse and light up the glutes.
Pause at the top for a beat, then lower slowly. If your low back takes over, reduce range and reset your starting position.
Kickbacks — hands-and-knees and standing
On hands-and-knees, brace the core and keep the spine neutral. Extend the hip without arching the back; move with control.
For standing kickbacks, hold a wall for balance. Tap the toe back, lift a few inches, squeeze, then return slowly. Small ranges you can own beat big swings.
Side plank with row
Stack the feet and set elbow under the shoulder. Row the band to your ribcage while resisting any twist through the trunk. This trains anti-rotation and lateral core strength.
- Keep breathing behind a braced abdominal wall—think “exhale, ribs down.”
- Two sets here go a long way toward better squats, hinges, and presses.
- If your hip cramps, cut range and realign before the next rep.
| Exercise | Key cue | Why it helps |
|---|---|---|
| Glute bridge | Push floor, knees out | Builds hip drive and protects low back |
| Kickbacks | Neutral spine, controlled extend | Targets glutes while keeping alignment |
| Side plank row | Resist rotation, row to ribs | Improves lateral stability and anti-rotation |
Resistance band full body routine: sets, reps, and rest you can follow today
Follow this plug-and-play sequence to turn 20 or 40 minutes into a real training session. Use the warm-up before you start and the cool-down when you finish. Track your starting color or length so progress is obvious week to week.
40-minute plan — 12 exercises, two sets each
Structure: Three groups, repeat twice. Move through each exercise with clean form and steady tempo.
- Group 1 — Upper: pull-aparts, bent-over row, overhead press, biceps curl, triceps extension. Rest 45–60s between exercises.
- Group 2 — Lower: banded squat, hip hinge/hip thruster, lateral walk, reverse or lateral lunge. Rest 45–60s.
- Group 3 — Core/stability: glute bridge, kickback, side plank row. Rest 30–45s, then repeat Groups 1–3.
20-minute plan — one efficient set per exercise
Do one high-quality set of each exercise in the same order. Keep transitions tight and rest only as needed. This format keeps intensity up and saves time.
Reps & tempo: Aim for 10–15 reps. Use a 2–3 second descent, 1 second lift, and a 1-second pause at peak when you want more challenge.
| Plan | Sets | Rest |
|---|---|---|
| 40-minute | 2 | 45–60s (upper/lower), 30–45s (core) |
| 20-minute | 1 | Minimal — move with purpose |
| Progress tip | Track band length/color | Shorten or choke up to increase load |
If form fails, widen your stance or grip to reduce load and finish the set clean. Swap reverse lunges for step-ups if you have a stable step. Start each session with the quick warm-up and finish with a short cool-down to recover faster.
Form cues that matter: starting position, alignment, and smooth movement
Nail the starting position first — it sets the tone for every rep and limits sloppy habits. Stand tall, ribs down, and brace your core like you’re about to cough.
Set your feet evenly and grip the band so tension feels balanced across your hands. Make sure your back stays neutral; if you feel the low back, reduce range or lower resistance.
- Elbows: keep them close on rows and curls. Flared elbows waste force and stress the shoulder.
- Presses: stack wrist over elbow and finish with biceps near the ear. No arching of the back.
- Knees track over mid-foot; drifting inward means press out against the band slightly.
- Control the movement both up and down — the elastic will try to yank you; resist it.
- Pull band along a straight path; any diagonal drift shows a compensating position.
| Cue | What to check | Quick fix |
|---|---|---|
| Starting position | Tall chest, ribs down, even feet | Reset stance and grip evenly |
| Elbows & shoulder | Close elbows, stable shoulder blade | Shorten grip or lower resistance |
| Spine & breathing | Neutral back, exhale on effort | Reduce range and re-brace core |
| Path & tension | Straight pull, consistent tension | Adjust hands or stance to balance tension |
Film one set from the side to check position and movement. Small tweaks to your starting position unlock better, safer reps every time.
Progressions and scaling: adjust tension, stance, and tempo to keep improving
Small, consistent tweaks are your best tool to keep getting stronger without buying new gear. Adjusting how tight the band feels, where your feet sit, and how long each rep takes changes the load almost instantly.
Make it harder
Shorten the loop by choking up or stepping wider to increase tension. Slow the eccentric to 3–4 seconds and add a 1–2 second pause at the top.
- Pre-stretch the loop before the rep to raise starting load.
- Add 5 mini pulses where it burns, or a longer pause to lock in time under tension.
- Progress weekly: add 1–2 reps, a tiny stance change, or a longer pause instead of jumping weight fast.
Make it easier
Widen your grip, take a narrower stance, or cut range to the pain-free zone you can control. Swap to lighter bands for high-rep work or technique practice.
| Lever | How to do it | When to use |
|---|---|---|
| Tension | Choke up or step wider | When you need more load without extra weight |
| Tempo | Slow eccentric, add pauses | To increase time under tension and build strength |
| Stance & position | Widen or narrow feet; change angle | When movement stalls or form breaks |
| Load swap | Use lighter bands or different exercises | For high-rep finishers or rehab days |
Quick rule: track RPE and aim for 7–8 on main sets. Prioritize perfect position over extra load — clean reps stack up into results.
Cool-down and recovery: stretch, breathe, and reset
A short, targeted cool-down lets your muscles relax and your nervous system unwind. Spend 5–10 minutes on easy moves that feel good right after a session.
Drop to the floor and take 1–2 minutes of deep nasal breathing. Long exhales calm your heart rate and help the whole body settle.
Do a 60–90 second hip flexor stretch per side. Follow with thread-the-needle or child’s pose to open the back and shoulders after rows and presses.
Use a light band for supine hamstring flossing to restore length without force. Add a gentle figure-four to target the glutes while keeping the core relaxed.
- Finish with 5 cat-cows to re-mobilize the spine and check smooth, pain-free motion.
- Hydrate and eat a protein-rich meal within a couple of hours to support recovery from resistance work.
- Note tight spots and address them first in your next warm-up.
| Move | Duration | Focus |
|---|---|---|
| Deep nasal breathing (on floor) | 1–2 min | Reset nervous system, relax body |
| Hip flexor stretch | 60–90 sec / side | Open hips, balance hinge work |
| Thread-the-needle / child’s pose | 60 sec | Open back and shoulders |
| Supine hamstring floss + figure-four | 60–90 sec each | Restore hamstring length, glute release |
Conclusion
With structure and small tools, you can get meaningful strength from any room. This plan gives a clear warm-up, upper and lower work, core finish, and a short cool-down you can repeat.
Use the 40-minute option when you have time and the 20-minute workout when life gets busy. Track your setup, reps, and how the band felt so progress is easy to see week to week.
Prioritize clean form and steady tempo. When a move gets easy, shorten the loop or slow the lowering. When it’s too hard, widen your stance or cut range.
Your next step: schedule three training sessions this week and start light. Stick with it, refine your setup, and you’ll build real, resilient strength without heavy gear.