Try these at home cardio workouts without jumping and feel your heart rise while your joints stay calm. The first move sparks curiosity: can you get real results with soft, steady effort? Yes — and it often feels more sustainable than pounding.
These simple plans mix brisk marching, controlled squats, and dance-style steps to keep your lungs working and your legs protected. You’ll learn how to structure circuits — 30–60 seconds of work, 30–60 seconds rest — so the session fits your schedule and the Physical Activity Guidelines of 150–300 minutes per week.
Expect clear effort checks, scaled variations for beginners to advanced, and technique cues that let your body feel strong, not battered. This short routine gives practical steps, minimal gear options, and a weekly flow you can follow today.
Key Takeaways
- You can build endurance while protecting joints with low-impact moves.
- Short circuits of 30–60 seconds keep intensity high and time low.
- Minimal equipment and small spaces work fine for real progress.
- Progression comes from effort and reps, not pounding the floor.
- Clear technique cues reduce injury risk and improve results.
Why low-impact cardio works for your heart and joints at home
You can raise your heart and fitness without harsh pounding. Low-impact moves keep the load off knees and hips while still challenging your lungs and muscles. That balance helps your body recover and keeps you consistent.

How this works in practice:
- Low-impact options strengthen the heart and protect joints, so you stay consistent longer.
- Moderate intensity targets about 65–75% of max, while vigorous efforts reach higher zones—so you raise your heart rate with smart effort.
- Train at RPE 3–7 on a 0–10 scale to push fitness without burning out.
- This kind of training fits small spaces and short sessions, making real workouts easier to schedule.
Do this 3–5 days a week and you’ll build endurance, reduce soreness, and level up your cardio the right way.
Set up your space for success and safety
A smart setup keeps your body safe and your session efficient; start with these steps. Clear a rectangle of floor so your feet can move forward, back, and side without catching a cluttered item.
Stable surfaces and footwear
Anchor or remove slippery rugs to protect your knees and keep a solid training position. Wear non-skid shoes on hard floors so your body stacks well when you change direction.
Simple gear that helps
Place a sturdy chair or wall within arm reach for balance during single-leg drills. Keep a visible timer so your workout stays on track and work/rest time is clear.
- Keep water nearby and use your hands to sip between sets so hydration doesn’t slow you down.
- Light weights or filled bottles add challenge later without taking much space.
- If you’re standing on carpet, test traction with a quick lateral step so your foot won’t twist during direction changes.
Quick safety checklist: clear floor, stable rugs, non-skid shoes, a nearby support, visible timer, and water. Warm up at least five minutes and cool down when you finish to protect joints and get the most from every session.
Warm up the right way before you start
Start your session with a short, purposeful warm-up so your body and breath match the work ahead. Spend five to ten minutes on dynamic exercise to raise your heart rate and core temperature while keeping impact low.
Five to ten minutes of dynamic moves
Begin with marching in place for one to two minutes. This grooves rhythm, wakes your hips, and activates the core.
Add arm circles for 30–60 seconds to open the chest and loosen tight shoulders. Use small circles first, then grow the range.
Example sequence and cues
- Marching: lift knees comfortably, swing arms, breathe steady.
- Arm circles: keep shoulders down; reverse direction halfway through.
- Trunk rotations: feet hip-width, rotate from the thoracic spine to prep obliques.
Progress intensity gradually: each minute gets a bit bigger or faster. Keep ranges pain-free and save deep positions for later. Finish by rehearsing the first circuit move so your body feels coordinated before the main set.
| Move | Duration | Main Benefit |
|---|---|---|
| Marching in place | 1–2 min | Raises heart rate; wakes hips and core |
| Arm circles | 30–60 sec | Opens chest; mobilizes shoulders and arms |
| Trunk rotations | 30–60 sec | Improves mid-back mobility; primes core for anti-rotation |
Know your effort: RPE and target heart rate made simple
Dialing effort with simple cues and numbers makes your training more reliable and efficient. This short guide helps you pick the right zone for most sessions and for harder intervals.
How to use the talk test and a 0–10 RPE scale
Use a 0–10 RPE scale: 0 is rest, 10 is an all-out sprint. Aim for 3–7 during most sessions.
- RPE 3–4 (moderate): you can speak full sentences. Keep effort steady.
- RPE 5–7 (vigorous): you manage only a few words between breaths.
- Reassess every minute or two and tweak pace or range to stay in zone.
Moderate vs vigorous: where your heart and breathing should be
Estimate max heart rate with 220 − your age. Train around 65–75% of that for moderate days.
On short, tougher intervals, let heart rate climb to roughly 76–96% if you’re cleared and conditioned.
| Intensity | RPE | Heart rate % of max |
|---|---|---|
| Moderate | 3–4 | 65–75% |
| Vigorous | 5–7 | 76–96% |
Practical tips: Match breathing to effort with smooth inhales and controlled exhales. If tech fails, the talk test and RPE guide your progress. Note what feels right—your perception gets sharper fast.
Technique essentials to protect knees, hips, and back
Move with purpose: steady alignment beats fast sloppy reps every time. Use the cues below to protect your knees, hips, and back while keeping intensity up.
Key position cues
Set your stance with your feet hip-width apart. This gives your knees room to track and keeps balance steady.
Slightly bend knees before changing direction. Think of joints as springs—soft, ready, and controlled.
Spine, hips, and core
Hold a neutral spine to protect your back. Picture a long line from tailbone to crown and keep your lumbar curve in place during air squats.
Engage the core before each rep. Exhale gently and brace like you’re zipping up tight jeans.
Footwork and shoulders
Roll through the foot: midfoot to heel on step-backs, heel to forefoot on step-outs. That smooth transfer replaces impact and keeps joints calm.
Keep shoulders relaxed and stacked over hips. Drive arms with intent to raise effort safely without adding harsh speed.
- Track knees over mid-toe—don’t let them cave inward on squats or lateral moves.
- Heels flat and hips sit back on hinges; this preserves the lumbar curve and uses glutes more.
- Warm up, hydrate, and cool down to lower injury risk and aid recovery.
| Cue | Why it matters | How to check | Quick fix |
|---|---|---|---|
| Feet hip-width apart | Improves stability and knee tracking | Look down; toes point forward or slightly out | Widen or narrow stance 1–2 inches for comfort |
| Bend knees slightly | Pre-load joints to absorb force | Feel tension like a spring before direction change | Practice mini-squats to groove the pattern |
| Neutral spine & core | Protects the back and transfers force safely | Hand over lower back; maintain natural curve | Reduce depth until you hold the line |
| Controlled foot roll & arm drive | Reduces impact and raises effort safely | Notice smooth foot contact and purposeful arms | Slow tempo for 5–10 reps to reinforce control |
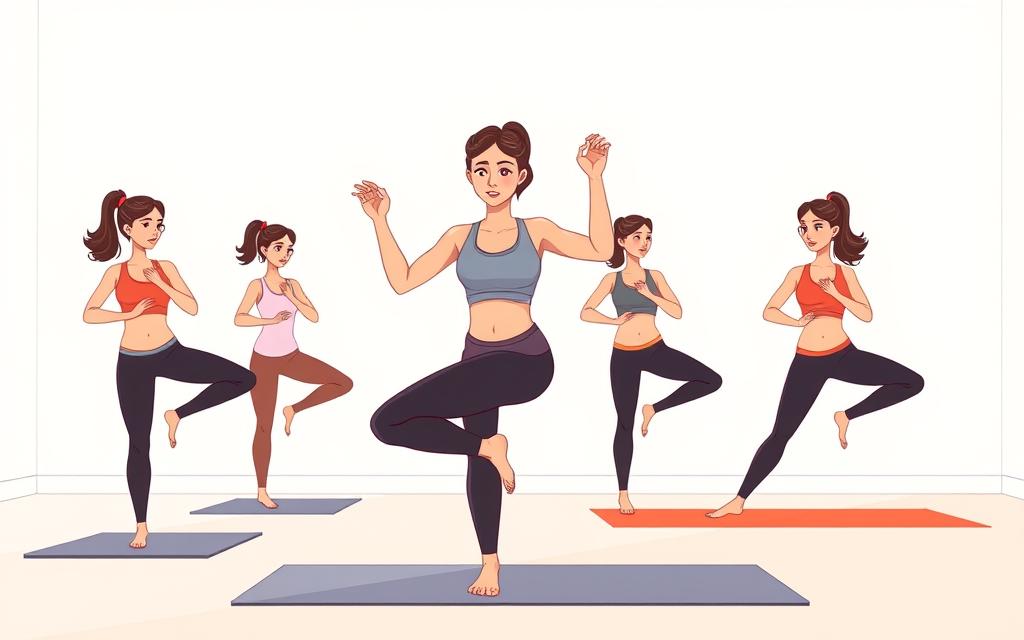
Beginner no-jump moves to get your heart rate up
Open with easy, controlled moves designed to raise effort without impact. These steps teach rhythm, breathing, and safe mechanics so you can build a base that lasts.
Marching in place with high knees and arm swings
Stand tall and march, driving each knee toward hip height. Swing your arms with intent to raise effort and keep the torso steady.
Keep your core engaged and breathe steady. If balance feels tricky, tap the right foot and left foot closer between reps.
Low-impact jumping jacks: step-outs with overhead arms
Step your right foot out as your arms lift overhead, then return to center and switch to the left foot. Keep the rhythm smooth—think “step, reach, step, reach.”
Stay standing tall through the torso. Avoid leaning when a foot steps wide to keep the position strong and let muscles, not joints, drive the move.
Air squats: depth, stance, and breathing cues
Set your feet shoulder-width, or keep feet hip-width apart if that feels better. Sit the hips back and down with heels flat.
Inhale for three seconds as you descend, then use one strong exhale to stand and engage the core. Use a chair touch to gauge depth if knees feel tight.
- March: drive knees, swing arms, stay tall.
- Step-jacks: right foot, left foot, smooth rhythm.
- Squat: hips back, heels down, knees track over mid-toe.
| Move | Duration/Reps | Main Cue |
|---|---|---|
| Marching | 30–60 sec | Drive knees, arm drive |
| Step-outs (jacks) | 20–40 reps | Stand tall, smooth steps |
| Air squat | 8–15 reps | Hips back, exhale to stand |
Intermediate low-impact exercises that build cardio and strength
Progress to richer patterns that challenge balance, hips, and legs while staying kind to joints. These moves raise effort and teach control. Use them to bridge beginner drills and tougher sessions.
Skaters (no hop): curtsy pattern side to side
How: Step the right foot behind into a curtsy, chest up, hips square. Push through the front leg to rise and switch sides.
Form tip: Keep weight over the midfoot and resist letting the knee cave. You’ll feel the glutes and outer hips fire as you move side to side.
Lateral shuffles: quick feet with a slight squat
How: Sit into a slight squat and shuffle across the space with quick, controlled steps. Lead one rep with the left foot, next with the right foot to balance training sides.
Progression: Increase speed, or add depth to the squat to boost intensity. Touch the floor only if your spine stays neutral.
Squat to jab: add upper-body speed for more calories
How: Sink into a solid squat, then stand and snap two cross-body arms. Own the rhythm before adding speed or light weight for the punches.
Why it works: This ties lower-body power to arm drive, increasing heart rate while strengthening legs and glutes.
- Keep weight balanced over the midfoot during changes.
- Avoid foot rotation inward when you turn quickly.
- Start bodyweight; add light weight once form is consistent.
| Move | Main cue | Progression |
|---|---|---|
| Skaters (no hop) | Chest up, hips square | Increase reach; hold light weight |
| Lateral shuffles | Slight squat, quick feet | Faster tempo; deeper squat |
| Squat to jab | Explode through legs, snap arms | Add light weight for punches |
Want more strength moves you can pair with these? Check this top bodyweight exercises list for simple progressions and extra ideas.
Advanced no-jump alternatives to common high-impact moves
If you want the same burn without the bounce, these advanced no-jump swaps keep intensity high and impact low. They match the intent of classic moves while protecting knees and hips.
Modify jacks, burpees, and mountain climbers with control
Low-impact jacks: Step one leg out as your arms lift overhead, then switch. Keep your core braced and position tall. Use slow, steady breaths and avoid any snap in the knees.
Burpee alternative: Place your hands on the floor, step the right foot back, then the left foot into a firm plank. Hold a tight midline, step both feet forward, and stand. No jump. Repeat leading with the right foot, then match reps with the left foot.
Mountain climber alternative: From a high plank, march one leg at a time toward your chest. Keep hips level and shoulders stacked over your hands. Move quickly enough to raise heart rate but keep form solid.
Reverse-lunge to front kick: balance, glutes, and core challenge
Step back into a reverse lunge, pause with a soft bend in the knees, then drive up and extend a controlled front kick. Focus on the leg that stepped back, then alternate to the other side.
- Lead a set with the right leg, then match volume with the left leg to keep strength even.
- Land each step with a quiet foot and steady core so your upper body does not sway side to side.
- If balance is shaky, use a wall touch for light support and work up to free balance.
| Move | Main cue | Joint-friendly tweak |
|---|---|---|
| Low-impact jacks | Core tall, arms overhead | Step-outs instead of hops |
| Burpee alternative | Hands firm, plank tight | Step back/step in; skip the jump |
| Plank march | Hips level, shoulders stacked | March one leg at a time |
Quick coaching note: keep a soft bend knees on transitions and cue a slow foot roll to preserve ankle and knee comfort. These swaps keep the work high and the impact low so you can train more often and feel stronger.
at home cardio workouts without jumping: a ready-to-use circuit
Ready for a plug-and-play circuit that builds fitness and spares your joints? This six-move routine takes about 20 minutes and is easy to scale. Follow the timing options below and pick a pace that challenges you.
Six-move, 20-minute low-impact circuit you can repeat
Do these six exercises back-to-back:
- Low-impact jumping jacks (step-outs with arms overhead)
- Skaters (no hop)
- Squat to jab
- Standing oblique crunch
- Lateral shuffle
- Reverse-lunge to front kick
Timing options: 45–60 seconds work, 15–30 seconds rest
Work 45–60 seconds per move, rest 15–30 seconds between exercises. After all six, rest up to 60 seconds and repeat 2–3 rounds.
| Move | Work time | Rest |
|---|---|---|
| Each exercise | 45–60 sec | 15–30 sec |
| Between rounds | — | 30–60 sec |
| Total session | ~20 min (2 rounds) | Adjust per fitness |
Simple cues to keep strong form: keep hands relaxed and chest up on punches. Drive through your back and core, not just the shoulders. Plant each foot with control so your feet and foot position track cleanly.
Choose 45 seconds if you’re newer; push to 60 once you own the movement. Add a light weight for punches later to increase calories and training demand. Track your best round and aim to match or beat it next session.
How to progress week by week without adding impact
Make steady progress each week by adjusting effort, not impact. Use one change at a time so your body adapts. Small, safe steps protect your knee and keep gains consistent.
- Add weight gradually: start with 2–5 lb dumbbells on punches or holds for squat and lunge when form is solid.
- Increase time under tension: move from 45 to 60 seconds before adding rounds or speed.
- Reduce rest: shave 5–10 seconds between sets to raise the challenge while keeping impact low.
- Expand movement range: slightly deeper squat or a longer lunge step only if the knee feels good.
- Use tempo: slow lowers and faster stands to light up legs without any jumping.
- Progress rounds: add one more circuit instead of pushing uncontrolled speed.
- Plan recovery: alternate build weeks with deload weeks to avoid nagging joint fatigue.
| Change | When to use | Benefit |
|---|---|---|
| Add weight | After consistent good form | Boosts strength and overall fitness |
| Increase time | When you can hold pace for 45 sec | Improves endurance and time under tension |
| Reduce rest | To raise cardio demand | Raises heart rate while keeping impact low |
Track it: keep a quick log of time, weight, and notes on any knee soreness. Small records help you repeat wins and tweak what matters.
Sample 3-5 day weekly routine that meets activity guidelines
A simple 3–5 day routine can deliver real progress when you mix steady sessions with a couple of harder efforts. Aim for 150–300 minutes of moderate exercise each week by combining moderate and brief vigorous days.
Weekly layout and intensity targets
Plan 3–5 sessions per week. Use RPE 3–4 for steady days (HR ~65–75% max). Add brief RPE 5–7 bursts on one or two tougher sessions (HR ~76–96%).
- Example 3-day split: Day 1 moderate circuit (45–60 min), Day 3 standing mobility + light technique (30 min), Day 5 moderate-to-vigorous circuit (45–60 min).
- Rotate focus: one session emphasizes legs and lateral moves; another leans on upper-body drive and core stability.
- Space the hard session away from the other intense day to keep knees and body recovered.
- Always check foot comfort and shoe traction so your position and balance stay consistent.
- Finish each session with a short cooldown to lower heart rate and speed recovery.
| Day | Duration | RPE target | Main focus |
|---|---|---|---|
| Day 1 | 45–60 min | 3–4 | Moderate circuit — legs & lateral moves |
| Day 3 | 30 min | 2–3 | Standing mobility & technique |
| Day 5 | 45–60 min | 4–7 (bursts) | Mixed moderate + short vigorous intervals |
Form cues for tricky movements people often rush
Rushed form creates bad habits; use a few tight cues to fix common mistakes fast. These quick checks help you hold position and keep each movement efficient and safe.
Squat — keep hips back and down, maintain a slight lumbar curve, and press heels into the floor. Think “sit back, then down.” This protects your back and knees and keeps your feet rooted.
Shuffle — stay low with a slight squat and lead with the hips, not the shoulders. That keeps your body centered between your feet and improves balance as you speed up.
- Low-impact jacks: raise hands only as high as you can keep ribs down; avoid arching to fake range.
- Lunge: shorten the step until balance is automatic, then inch forward as you get steady.
- Punches: stay tall; power comes from the floor up, not from shrugged shoulders.
Control the last inch of every rep — don’t slam end ranges to chase speed. Breathe out on effort so your core braces and your spine stays long. If anything wobbles, cut range, regain balance, then add speed for true cardio benefit.
| Cue | Common error | Quick fix |
|---|---|---|
| Hips back, heels flat (squat) | Weight forward, knees caving | Tap a chair to learn depth; keep chest proud |
| Lead with hips (shuffle) | Turning with shoulders first | Drive hip toward direction, keep knees soft |
| Hands reach with ribs down (jacks) | Overarching upper back | Limit reach; keep chest neutral |
Make it knee-friendly: smart tweaks for right knee or left knee discomfort
When a knee feels off, tiny edits to stance and tempo let you keep progress safely. Start with the basics: clear space, warm up 5–10 minutes, and listen to your body.
- Shorten ranges first — try a half-squat or shallow lunge if the right knee is cranky today.
- Use a staggered stance with feet hip-width apart to cut knee shear and give the hips more room.
- Lightly touch a chair with your hands for balance on single-leg drills to calm the nervous system.
- Shift load to the hips with a hip hinge so the glutes absorb more force when the knee is sensitive.
- Keep the front foot flat and the back foot on the ball during reverse lunges to guide alignment.
- Lead sets with the left leg or right leg depending on which side feels fresher; match reps to keep balance.
Maintain a tall back and stack ribs over hips. Reduce impact by slowing tempo, pausing mid-range, and building tension without speed. These tweaks let you train smart and keep knees productive, not painful.
| Issue | Immediate tweak | Why it helps |
|---|---|---|
| Right knee soreness | Half-squat, shorter step | Less joint load; maintains effort |
| Unstable single-leg | Chair support with light hands | Improves balance; lowers fear response |
| Front-knee pressure | Hip hinge, glute drive | Shifts force to hips and back |
Common mistakes that spike impact and how to fix them
Small mistakes in timing and stance turn gentle moves into high-impact trouble. Spot the slip, name the fix, and reset your position before the next rep.
- Rushing direction changes: soften first, then step. Bend knees and push off the whole foot to control momentum.
- Feet too wide or too narrow: reset to a balanced stance. Rebuild your foot position before you resume reps.
- Collapsing the arch on one foot: cue a “tripod foot” — big toe, little toe, heel — so the knee tracks cleanly.
- Turning step-outs into sneaky jumps: keep one foot grounded during jacks and slow the arms slightly to remove bounce.
- Over-arching the ribs on punches: exhale, pull the ribs down, and let your core drive the punch for less upper-back strain.
- Dropping the chest on squats: send hips back, keep eyes on a fixed spot, and stand tall to protect the spine and knee.
- Ignoring sharp knee signals: back off range or volume immediately, especially if the right knee flares. Rest, then retest with a smaller range.
- Chasing speed over control: own the rhythm first. Smooth reps protect joints better than fast, choppy ones.
| Issue | Quick fix | Why it works |
|---|---|---|
| Rushed turns | Bend knees, step with full foot | Reduces shear and peak impact |
| Foot position drift | Reset stance; use small reps | Restores balance and tracking |
| Right knee pain | Cut depth; match reps to other side | Limits load and maintains symmetry |
Final note: control the step and bend before changing direction. That single habit protects knees, keeps your chest tall, and lets the core do its job while you level up safely.
Cooldown and mobility to finish strong
Bring your session to a gentle close with standing mobility and breathing that lowers your heart rate. This short flow soothes the nervous system and helps your muscles recover faster.
Slow marching and trunk rotations
Slow march 1–2 minutes: walk in place with soft knees to ease the heart rate down. Keep your hands relaxed and your gaze forward.
Follow with trunk rotations. Stand with feet hip-width, rotate the torso slowly to each side. Soft knees and controlled motion release mid-back tension.
Chest, shoulders, calves and legs
Use a doorway or wall to open the chest and sweep the arms down and back. Hold 20–30 seconds per side to loosen tight shoulders and chest.
Place your hands on a wall and lean into a calf stretch. Let each foot press into the floor and feel the ankle soften.
Finish with light quad and hamstring work for the legs—standing heel pulls and forward reaches keep mobility useful and practical.
Breathing to lower heart rate
Lie down or stay standing if preferred. Breathe 4 seconds in, 6 seconds out for 1–2 minutes. Long exhales nudge the body into recovery mode.
End with three diaphragmatic breaths while scanning for any leftover tension. Relax the body, note where muscles still feel tight, and plan a short follow-up stretch if needed.
| Move | Duration | Main benefit |
|---|---|---|
| Slow march | 1–2 min | Gradual heart rate reduction; gentle nervous system reset |
| Trunk rotations | 30–60 sec each side | Mid-back mobility; posture reset |
| Chest opener + calf press | 20–30 sec each | Opens chest; reduces shoulder tightness; relieves ankle tension |
| Quad/hamstring standing stretch | 20–30 sec each leg | Reduces leg stiffness after squats, shuffles, and lunges |
Conclusion
Wrap up with a clear next step so small, steady choices stack into real change. Aim for consistency—3–5 sessions per week—and repeat the circuit when time is tight.
You can get serious cardio and protect your joints. Use the setup, warm-up, and circuit above as your go-to exercises to save time and keep effort high.
Progress smartly: add time, deepen range, or introduce a light load rather than forcing impact. Expect stronger legs and glutes, steadier balance, and a calmer nervous system after a few weeks.
Keep the focus on quality reps and logged progress. When you’re ready, repeat the circuit, tweak one variable, and let consistency do the heavy lifting for your heart and fitness.