Ever stare at a blank wall in your living room, craving that deep, satisfying burn in your back but feeling totally stuck? I’ve been there—the frustration is real. Good news: an amazing pull workout without a pull-up bar is not only possible, it’s incredibly effective.
Fitness expert Rachel MacPherson highlighted this perfectly in her March 2026 insights. She showed that high-quality back training doesn’t demand a traditional gym setup.
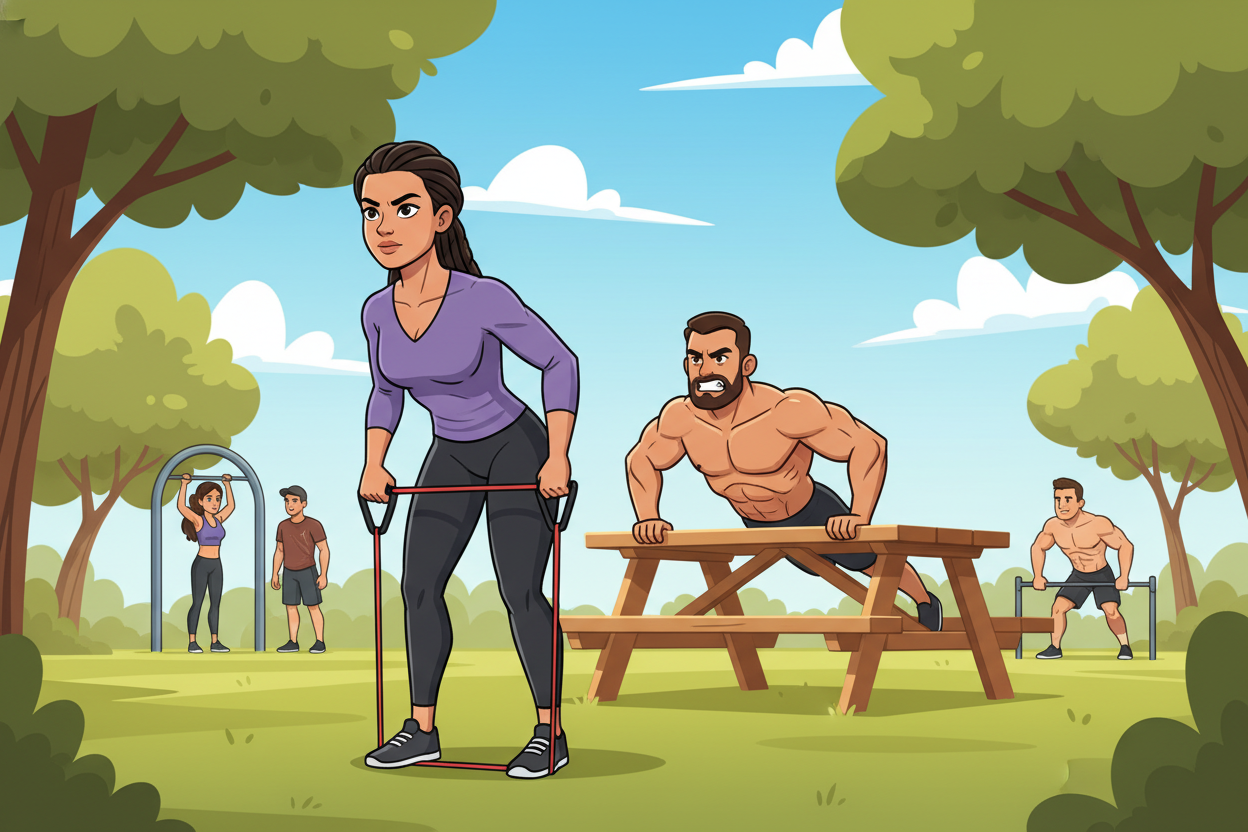
We’re going to use what you already have—your own body and maybe a towel or a sturdy table. You can absolutely replicate the intensity of a gym session right at home.
My goal is to cut through the confusion and help you feel confident. You don’t need fancy gear to build a powerful, sculpted upper body.
By focusing on smart movement patterns, you’ll target your lats and biceps and see serious progress. Let’s grab this challenge and crush it together.
Key Takeaways
- You can build a strong back without any specialized equipment.
- Bodyweight exercises are highly effective for targeting major muscle groups.
- Simple household items like towels can be great workout tools.
- Proper form is more important than having fancy gear.
- Consistency with the right moves leads to noticeable progress.
- This approach makes fitness accessible anywhere, anytime.
- You can achieve gym-level intensity in your own space.
Understanding the Challenge of Pull-Ups
You’re in good company if you’ve ever felt defeated by a pull-up bar—this common struggle unites fitness beginners and veterans alike. Over 500,000 people have found inspiration through communities like Pullup & Dip, proving how widespread this challenge truly is.

Benefits of Pulling Movements for Upper Body Strength
These essential motions do far more than just sculpt your back. They create a balanced, powerful physique that supports better posture and daily movement.
Engaging in proper pulling exercise builds functional strength that translates to real-world activities. Your entire upper body benefits from this type of training.
Why Not Everyone Can Do a Full Pull-Up
A complete pull-up demands significant relative strength. You must lift your entire body weight against gravity.
This requires coordinated effort from your back, arms, and core. It’s perfectly normal to seek alternatives while building foundational power.
Understanding your back mechanics is the first step toward progress. With smart training, your body will adapt over time.
Decoding the Muscles Behind Your Pull Workout
I remember when I first learned which muscles were actually doing the work during back exercises—it was a game-changer. Knowing this anatomy helps you engage the right areas and maximize every session.
The Lats, Traps, and Biceps in Focus
Your latissimus dorsi is the star player. It’s the largest upper back muscle and creates that powerful V-shape. This lat is your primary pulling engine.
Your biceps work closely with your back to move your arms. Meanwhile, your trapezius muscles provide crucial stability for controlled movement.
Focusing on these groups builds the width and thickness for a strong, balanced physique.
Secondary Muscles That Support Pull Movements
The shoulder complex acts as a vital protector for your joints during training. It keeps everything aligned and safe.
Don’t forget the rear deltoids and forearms. These unsung heroes give you better grip and control through every repetition. They make your main movers even more effective.
Exploring pull workout without pull-up bar Options
I used to believe I needed a gym membership to get a serious back session, but I was completely wrong. The real secret is learning to use your environment creatively.
You can create a highly effective routine at home. Simple tools replace the need for a permanent bar installation.
Finding a reliable method is key for consistency. I’ve used door frames and sturdy tables to challenge my muscles.
Brands like Pullup & Dip offer mobile gear for indoor and outdoor training. This ensures you can train anywhere, anytime.
Having a dedicated home setup means you never miss a session. Consistency truly is the secret to success.
| Equipment Alternative | How to Use | Key Advantage |
|---|---|---|
| Door Frame | Install a removable bar for bodyweight rows. | Zero permanent installation needed. |
| Sturdy Table | Perform inverted rows under the surface. | Utilizes existing furniture. |
| Resistance Bands | Anchor high and pull for lat engagement. | Portable and intensity is scalable. |
| Towel | Drape over a door for horizontal pulls. | Maximizes grip strength development. |
This table shows you don’t need expensive gear. A smart alternative keeps your progress on track, no matter where you live.
Chin-Ups and Grip Variations for Enhanced Strength
I used to think a chin-up was just a different name for a pull-up, but the difference in muscle focus is huge. This simple change in hand position is a game-changer for building a powerful upper body.
How Underhand Grips Shift Emphasis to the Biceps
When your palms face you, your biceps become the prime movers. Pulling until your chin reaches the bar places a fantastic demand on the front of your arms.
This underhand position creates a more natural line of pull for these muscles. It’s a brilliant way to develop serious curling power.
Alternating Between Chin-Ups and Wide-Grip Pulls
Don’t just stick to one style. I alternate my grip to hit my back from every angle. This prevents overuse and builds a balanced, resilient physique.
Your hands are your connection to the movement. Changing their spacing alters which muscles work hardest.
| Grip Type | Hand Position | Primary Focus | Best For |
|---|---|---|---|
| Underhand (Chin-Up) | Palms facing you, shoulder-width | Biceps & Lower Lats | Arm development & strength |
| Overhand (Pull-Up) | Palms facing away | Upper Back & Rear Delts | Back width & posture |
| Wide-Grip | Hands placed far outside shoulders | Outer Lats | Creating a V-taper |
Use this table as a guide to rotate your focus. Strategic variation is the secret to continuous strength gains.
Assisted Exercises: Bands and Machines for Beginners
There’s a secret tool that bridges the gap between dreaming of a strong back and actually building one. Assisted exercises give you the boost needed to master the movement pattern safely.
This approach is perfect for anyone starting their strength journey. You build confidence while your muscles learn the correct path.
Using Resistance Bands for Gradual Strength Building
I love using resistance bands for this. They provide scalable support, letting you complete a full range of motion.
Start with a thicker band to get more assistance. As you get stronger, switch to a lighter one to increase the challenge.
This method of training controls the resistance perfectly. Every rep is done with great form, which is crucial for growth.
Creating a Home Setup for Assisted Pull Movements
You can easily set this up at home. Find a sturdy anchor point, like a door frame or a solid beam.
Loop the band over it securely. Now you can manage your body weight effectively and build power progressively.
| Band Color | Assistance Level | Best For | Next Step |
|---|---|---|---|
| Black (Extra Heavy) | High Support | Absolute Beginners | Move to Blue |
| Blue (Heavy) | Moderate Support | Building Consistency | Move to Green |
| Green (Medium) | Light Support | Near-Unassisted Strength | Try Bodyweight |
Use this guide to track your progress. Moving down the table means you’re getting seriously stronger.
Seated Suspension Pull-Ups for Core and Back Activation
Suspension trainers aren’t just for standing exercises—they unlock a seated variation that fires up your entire midsection. I love using TRX straps anchored to a solid overhead point. This setup lets you perform a powerful pulling movement while your feet stay planted on the floor.
Here’s why this exercise is a secret weapon. Sitting down forces your core to engage intensely. You must brace your entire midsection to keep your body stable during each rep.
This focus eliminates any chance of using your legs for momentum. All the tension goes directly into your back muscles, creating incredible activation.
Keep your torso in a straight line from head to hips as you pull. This alignment ensures you’re working the correct muscles for maximum strength development. It builds serious power in your upper back.
You can easily adjust the challenge. Place your feet further forward to increase the angle and make it harder. It’s a versatile move suitable for all fitness levels.
Australian Pull-Ups: Rowing Movements Made Simple
Let’s talk about a move that feels like a secret weapon for building a strong back—Australian pull-ups. This exercise brilliantly mimics a horizontal row. You perform it by pulling your chest to a bar while your entire body stays at a sharp angle to the floor.
It’s a staple for anyone aiming to develop serious upper body strength. The movement allows for a high volume of controlled, safe repetitions.
Adjusting Body Position for Maximum Muscle Engagement
Your body’s angle is the key to intensity. A lower anchor point makes the exercise significantly harder to perform. You can scale the challenge perfectly for your current strength level.
I always focus on keeping my back perfectly straight and my core tight. This ensures I get the most out of every single rep. By keeping your feet planted firmly, you create a stable base.
This stable foundation lets you pull with total confidence. Your focus stays entirely on muscle engagement in your upper back. It’s how you build a powerful, resilient physique.
Lat Pulldown Variations: From Gym Machines to Resistance Bands
Gym machines offer precise resistance, but a simple band can deliver an equally intense lat-focused challenge at home. In a gym, you’ll find machines with selectable resistance levels—typically from 5 to 120 kg. This lets you match the weight perfectly to your current strength.
At home, anchor a resistance band to a high, sturdy point. You’ll replicate the same essential lat-focused pulling motion. Both methods build serious upper body power.
Choosing Between Wide and Narrow Grips for Specific Benefits
Your hand placement changes everything. A wide grip on the bar targets the outer lat muscles for back width. A narrow grip shifts focus inward for more thickness development.
I suggest trying both styles. See which grip gives you the best mind-muscle connection. Your specific anatomy will determine what feels most natural.
| Grip Type | Primary Focus | Best For | Pro Tip |
|---|---|---|---|
| Wide Grip | Outer Lats & Width | Creating V-Taper | Pull elbows out to sides |
| Narrow Grip | Middle Back & Thickness | Building Density | Squeeze shoulder blades |
| Neutral Grip | Lower Lats & Biceps | Joint Comfort | Palms face each other |
Always initiate the pull with your back muscles. Don’t just rely on your arms. This ensures you get maximum benefit from every repetition.
Bent-Over Rows: Ensuring a Safe and Effective Back Workout
I learned the hard way that proper form in bent-over rows is non-negotiable for a safe and powerful back. This classic movement is a cornerstone for building serious strength and resilience.
It targets your entire posterior chain with incredible efficiency. When done right, you’ll feel every rep working deep into your muscles.
Proper Form and Posture to Prevent Injury
Start by hinging your hips back. Keep your spine in a neutral position to protect it during the entire pulling motion.
I always emphasize pulling your shoulder blades together at the top of the lift. This ensures your back muscles are fully engaged for maximum growth.
Never sacrifice posture to lift heavier. Maintaining proper form is the only way to prevent injury and see real results.
Keep your knees slightly bent and your core braced throughout. This creates a stable foundation for a powerful row.
Focus on a controlled tempo. Maximizing time under tension is the key to real strength gains from this workout.
Seated Cable Rows: Controlled Movements for Targeted Training
Nothing finishes a back session quite like the controlled burn of seated cable rows. This exercise is a game-changer for building serious thickness in your mid-to-upper back. You perform it by pulling a handle straight toward your lower abdomen.
Keeping your back perfectly straight and chest up is non-negotiable. I find that tucking my arms close to my torso is the secret. It isolates the back muscles and stops me from using momentum.
Your focus should be on squeezing your shoulder blades together at the peak of the row. This ensures you’re hitting the right muscles for maximum growth. It creates an incredible mind-muscle connection.
Your hands need to maintain a firm, steady grip on the handle. Avoid any rocking of your body back and forth during the pull. This control is what makes the movement so effective.
I love using this as a finisher. It allows for high-quality, controlled reps that leave your entire back feeling fully worked. You’ll walk away knowing you crushed every single one.
At-Home Pull-Up Alternatives You Can Do Today
I discovered one of the most effective back exercises while sitting at my kitchen table. Your home is full of perfect tools for a powerful session. You don’t need to buy anything special to get started.
This approach makes fitness incredibly accessible. It turns your living space into a personal training zone. Consistency becomes so much easier.
Utilizing Everyday Furniture for Bodyweight Rows
Rowing on the edge of a stable table is a classic bodyweight move. You simply sit underneath it and grab the edge firmly. Pull your chest up towards the surface while keeping your feet planted on the floor.
I love this because it’s accessible to everyone. It builds foundational strength for more advanced movements. Always test your table’s stability first to avoid accidents.
This is a perfect example of using your environment to stay consistent. You can find more inspiration in this proven list of top bodyweight exercises for.
| Furniture Type | Setup Position | Primary Muscle Focus |
|---|---|---|
| Sturdy Table | Sit under, pull chest to edge | Middle Back & Biceps |
| Kitchen Countertop | Stand leaning back, pull up | Upper Back & Rear Delts |
| Sturdy Chair | Lie under, pull chest to seat | Lats & Core Stabilizers |
This table shows how versatile your home can be. Each option provides a unique challenge for your muscles. Your next great session is literally right in front of you.
Maximizing Upper Body Engagement with Core-Integrated Moves
The secret to a stronger back isn’t just about your arms—it’s about connecting every muscle from your shoulders to your hips. I used to think isolating my back was the key, but I was missing a huge piece. True power comes from full-body integration.
Focus on Tightening Shoulder Blades and Engaging the Core
One of my favorite moves for this is the straight-arm pulldown. You keep your arms completely straight throughout the entire motion. This simple change fires up your abs while hammering your lats.
I always focus on squeezing my shoulder blades together. This ensures my upper body stays rock-solid and my back muscles do the heavy lifting.
By bracing your core, you create a stable platform for every pull. Your entire body works as one powerful unit.
Keeping your arms straight increases the lever length. This makes the exercise much tougher for your lats and core muscles. This type of training builds the functional strength you need for more advanced movements later on.
No-Equipment Moves: Training Your Back Anywhere
Let me introduce you to a move that turns your living room floor into a powerful back-building tool. The reverse elbow push-up is a brilliant exercise you perform at a 30-degree angle to the ground.
This position effectively targets your back muscles. You don’t need any gear at all.
I always use a mat for comfort. It lets me focus entirely on the contraction in my upper body.
By pressing your elbows into the floor, you create the resistance needed to lift your chest. It’s a simple movement you can do anywhere.
This humble move provides a serious challenge for your back and arm strength when you perform high reps. It’s perfect for travel or a quick home session.
You can scale this exercise by adjusting your body angle. Here’s how different variations change the focus.
| Variation | Body Position | Primary Focus | Difficulty Level |
|---|---|---|---|
| Standard | Elbows at 30°, feet on floor | Mid-Back & Rhomboids | Beginner |
| Elevated Feet | Feet on chair, hips high | Upper Back & Rear Delts | Intermediate |
| Single-Arm Iso-Hold | One elbow down, one arm extended | Core Stability & Unilateral Strength | Advanced |
Try the standard version first. Master the form before progressing. Your back will thank you for this versatile, equipment-free challenge.
Transitioning from Alternatives to Full Pull-Ups
Every rep of every alternative exercise has been building towards one defining moment: your first full, unassisted pull-up. This transition is where your dedication pays off in a huge way.
Moving from assisted moves to the real deal is a process. It requires a smart plan and a focus on consistent improvement.
Tracking Your Progress Through Progressive Overload
The secret is progressive overload. You must systematically challenge your muscles a little more each week.
I track my reps and the level of assistance I use. Seeing those numbers improve proves my strength is growing. Your ultimate goal is to slowly reduce that help.
You want to reach the point where you can lift your entire body on the bar. It takes serious patience and consistency.
Celebrate every small win along the path. Each hard-fought rep brings you closer to mastering this rewarding movement.
Integrating Alternatives into a Balanced Fitness Routine
The true power of these alternatives shines when you weave them into a consistent, smartly designed schedule. It’s how you build total body strength and see real change over time.
Mixing Pull Exercises for Total Body Strength
Don’t just repeat the same move. Rotate between rows, pulldowns, and bodyweight drills. This keeps your muscles guessing and growing.
Even challenges like the Murph—with its 100 repetitions—can be adapted. Use lat pulldowns or inverted rows if you’re not ready for that volume yet.
Designing a Home Workout Schedule That Works
Your home routine must fit your life. I aim for two to three sessions per week, with 24 to 48 hours of rest between each.
This recovery time is non-negotiable. It lets your back muscles repair and come back stronger.
Combine resistance bands, dumbbells, and your own bodyweight. This mix hits every muscle from every angle.
Remember, consistency beats perfection. Show up, put in the work, and you’ll reach your goal.
Conclusion
Your journey to a powerful back begins right here, with the tools and knowledge you’ve just unlocked. You now have a complete toolkit of effective movements to build serious strength, no traditional gym setup required.
Remember, the real secret is in the squeeze. I always focus on pulling my shoulder blades together during every rep. This simple cue fires up the right muscles for incredible growth.
These alternatives are far from placeholders. They are powerful tools designed to build the foundational strength you need for any future goal. I’ve seen incredible progress using these very methods.
Stay consistent. Track your progress. Most importantly, enjoy the process of transforming your back through these smart exercises. You have everything you need to start today—so grab your gear and begin your new workout!