Beginner Full Body Kettlebell Routine
Published
Grab one kettlebell and feel how a single tool can clear gym confusion and build real strength fast. The plan below centers on a simple circuit that blends press, row, squat, hinge, and rotation so you train strength, power, cardio, and core in one short session.
You’ll get a step-by-step routine you can run at home with one bell, clear cues to protect your back and shoulders, and a safe path to press overhead.
The circuit borrows from the Onnit/John Wolf single-kettlebell method: goblet squat, split-stance row, one-arm strict press, chest-loaded swing, halo, hip pass, and figure-8. Do three rounds with 1–2 minutes rest, focusing on form before adding weight.
Expect quick, effective workouts that fit into tight time windows, plus beginner-friendly substitutions if your shoulders need them. Read on to learn how to pick a bell, set the rack, and progress week to week with confidence.
Key Takeaways
- One bell, full results: a compact circuit that trains major patterns in minutes.
- Master five movement patterns first, then add reps and load safely.
- Clear cues keep your hips doing the work and protect your back and shoulders.
- Three rounds with 1–2 minutes rest is the starter template.
- Includes weight choices, press substitutions, and two simple weekly schedules.
Why kettlebells work for total-body training at home
Because the weight sits off the handle, every move demands better posture and tighter control. That offset center of mass (about 6–8 inches from the grip) forces more core and grip activation than a dumbbell does.
The result: you recruit more muscle, correct small posture leaks, and build usable strength with fewer tools. Consistent work can improve functional power, aerobic capacity, and core strength.
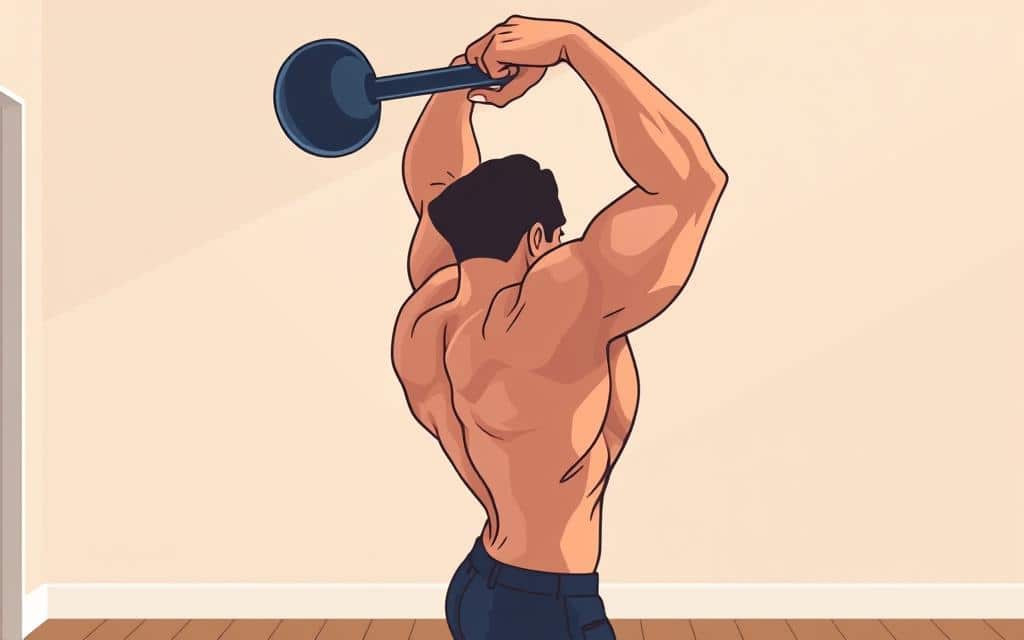
Kettlebells vs. dumbbells: offset load, grip, and movement patterns
The hanging load makes you stabilize through the hips and spine. Compared with dumbbells, kettlebells expose weak links in posture, so each rep improves movement quality as you get stronger.
Real benefits: strength, power, cardio, and core in less time
- Efficient patterns: hinge, squat, press, row, rotation, more work per set.
- Compound exercises raise heart rate and burn calories fast, so you need less equipment than a gym.
- Offset load upgrades grip and core endurance, which carries to daily tasks and sport.
Use this style of training at any level. One bell covers most needs while you learn movement, progress safely, and get real-world strength that sticks.
Master these movement patterns before you add reps or weight
Master a handful of simple positions and your lifts will suddenly feel easier and cleaner. Learn the hinge, squat, press, row, and rotation as shapes you can feel, not just names to repeat.
Hinge, squat, press, row, and rotation explained in plain English
Hinge: push your hips straight back like you’re reaching your butt to the wall. Feel your hamstrings tension and keep a long spine with your chest tall.
Squat: keep your heels down and knees tracking over toes. Sit between your legs, chest lifted, and stop before your tail tucks under.
Press: ribs down, brace your midline, and drive so the arm stacks over the shoulder. No leaning or flaring the chest.
Row: split stance, hinge from the hips, shoulders square to the floor, and pull the bell to your hip without twisting.
Rotation: move around your center and resist unwanted twist. Halos and hip passes teach control while you hold your midline.
What “good alignment” feels like from feet to head
- Screw your feet into the floor, glutes on, ribs stacked over pelvis, head tall, eyes fixed.
- Keep forearms vertical when possible, elbows tucked, shoulders down and back.
- Add load only when these positions are automatic on each side and you keep tension from the floor up.
| Pattern | Quick cue | Alignment check |
|---|---|---|
| Hinge | Hips back, chest forward | Long spine, hamstring tension |
| Squat | Heels down, sit back | Knees track over toes, chest up |
| Press | Ribs down, brace and drive | Arm stacks over shoulder, no lean |
| Row & Rotation | Hinge, pull to hip; control twist | Shoulders square, midline resists |
Quick warm-up to prep your shoulders, T-spine, and hips
Spend five minutes moving to wake your joints and raise temperature so your kettlebell training feels sharp, not stiff. This short flow primes the shoulders, T-spine, and hips without killing your power before you lift.
- Arm circles, 30 seconds each direction. Keep ribs down and neck long to wake shoulders and upper back.
- Cat-cows, 30 seconds, slow. Move the spine through flexion and extension to prep overhead and hinge positions.
- Kneeling hip flexor → hamstring, 30 seconds per side. Open the front of the hips and lengthen hamstrings used in swings and hinges.
- Bodyweight squats, 15–20 reps. Feet just outside hip width; groove knee tracking and warm ankles before you pick up weight.
- Glute bridges, 10–15 reps. Heels planted, ribs stacked, switch on glutes so the hips drive the hinge instead of the low back.
Mobility over static stretch: Keep moving. Avoid long holds before the workout so you raise temperature and range without damping power. Breathe through the nose, feel the floor under your feet and hands, and flow smoothly between drills. If you’ve been sitting, add an extra round of hip flexor to hamstring, tight hips pull the pelvis forward and wreck hinge mechanics.
| Approach | When to use | Effect on training |
|---|---|---|
| Dynamic mobility | Before the workout | Raises temp, preserves power, primes joints |
| Static stretching | After the workout or separate session | Improves length but can reduce force if done right before |
| Targeted activation | Right before lifts | Switches on glutes, shoulders, and core for safer reps |
Form first: how to hold the kettlebell, set your rack, and go overhead safely
Grip, rack, and brace: get those right and the press becomes simple and repeatable. Start each set by checking hand placement and stance. Small changes protect your shoulders and spine.
Hold the bell and when to flip it
For goblet moves, hold the bell by the horns close to your chest with forearms vertical. For swings and rows, grip the handle with a full hand and packed shoulders.
Flip the bell bottom-up when you need a slow, controlled halo or rotation. The bottom-up position teaches shoulder control without smashing your forearms.
Set the rack and stack your midline
Rest the weight between forearm and biceps. Keep your wrist neutral and elbow near your ribs. Chest up, ribs down, and brace your core so the load stacks over your midline.
Press basics without flaring ribs
Root your feet, squeeze your glutes, and drive. Keep the forearm vertical as the arm moves. At the top, biceps by ear and elbow straight without jamming.
- Pull the bell down like a pullup to return to the rack.
- Tuck the chin slightly so the bell clears cleanly.
- If knees lock or heels shift, reset your stance before the next rep.
| Check | Fix | Why it matters |
|---|---|---|
| Wrist angle | Neutral, handle centered | Protects elbow and improves grip |
| Rib position | Ribs down, core braced | Prevents low-back arching |
| Top position | Biceps by ear, head tall | Locks shoulder and shows good form |
Full body kettlebell routine for beginners
Turn one bell into a tight, time-saving circuit that hits every major pattern in under 20 minutes.
Run it as a circuit: work the whole body with one bell in minutes
Do one set of each exercise back-to-back, rest 1–2 minutes, and repeat for three rounds. This keeps intensity high and technique clear between sets.
The moves
- Goblet squat, 10 reps, hold the bell by the horns at your chest; feet just outside hip width, knees track over toes.
- Split-stance row, 8 reps per side; hinge from the hips and pull to the hip without rotating your torso.
- Strict press, 5 reps per arm from a solid rack; ribs down, glutes tight, forearm vertical.
- Chest-loaded swing, 15 reps; hinge, snap the hips, squeeze glutes at the top.
- Halo, 8 reps each direction, bottom-up hold to train shoulder control.
- Hip pass, 8 reps each side; pass the bell around your waist with a braced midline.
- Figure-8, 5 reps each direction; pass the bell through the legs, stay low and grounded.
Sets, reps, rest: sample template and progression
| Template | Reps | Rest |
|---|---|---|
| One set each (back-to-back) | See list above | 1–2 minutes between rounds |
| Rounds | 3 total | – |
| Starting weight | ~8 kg (women), ~16 kg (men) | Adjust to level |
Progress by adding 1–2 reps on key moves, trimming rest by 10–15 seconds, or stepping up weight once your form holds under fatigue. Keep cues tight: hips drive the swing and knees track over toes in the squat.
Technique cues you’ll actually use on every rep
Keep the cues you trust in your pocket, they’ll save reps when you get tired. Use them between breaths and before every set. Short reminders beat long checklists when the bell gets heavy.
Hips drive the swing, not your arms
Snap the hips like a hard jump while the arms stay relaxed. Your hips produce power; the arm is a hook that guides the bell.
Keep heels down, knees track over toes in the squat
Keep your heels glued and let the knees follow your toes. Open the hips and keep your chest proud so your back stays neutral.
Row to your hip without rotating your torso
Pull the bell to the hip, not the ribs. Anchor your shoulder blades and avoid twisting, that trains the lats and protects the spine.
- Brace before every rep: exhale slightly, lock ribs over pelvis.
- Feel the floor through heel and big toe for balance and power.
- Shoulders down into their “pockets”, keep them packed on each side.
- If you feel pulled to one side, tighten abs and squeeze glutes before the next rep.
| Cue | What to check | Why it fixes most errors |
|---|---|---|
| Hips | Explosive hip hinge | Keeps arms from driving swings and saves the back |
| Squat | Heels down, knees track | Maintains chest and prevents knee collapse |
| Row | Pull to hip, no twist | Targets lats and protects the spine |
| Grip | Same setup each rep, hold kettlebell steady | Creates repeatable form and safer progress |
Smart substitutions and regressions if overhead or shoulders are limited
If pressing overhead makes your ribs flare or your back arch, don’t panic. You can keep making gains while you fix range and control.
Press to a 90-degree elbow bend and hold. Stop the press when your elbow reaches 90 degrees. Pause 2–3 seconds and then return the bell to the rack under control. This mid-range hold builds strength where you need it and trains your core to stay stacked.
One-arm floor press: a safer press progression
Lie on the floor with knees bent and feet flat. Brace your core and set your working arm about 45 degrees from your side. Grip the handle, lower until your triceps touch the floor, then press back up.
The floor shortens the range and gives your shoulder extra support. You should feel the triceps and chest working, with the core keeping your ribs down. If the elbow slams to the floor or you lose brace, use less weight and slow the tempo.
- Alternate sides to keep balance and symmetry.
- Keep wrist neutral and think “pull down, then press up.”
- Choose a weight that lets you finish clean sets without losing posture.
| Regression | What to do | What you should feel |
|---|---|---|
| 90° press hold | Press to elbow at 90°, pause 2–3 sec, return | Mid-range strength, core engagement, less rib flare |
| One-arm floor press | Lie flat, arm 45° from side, lower triceps to floor, press | Shoulder stability, triceps drive, safer range |
| Grip and tempo tweak | Firm handle grip, slow eccentric, controlled rep speed | Stronger handle control, less momentum, cleaner lockout later |
Reassess weekly. When you can keep ribs down and head tall, gradually extend past 90 degrees. These steps build confidence, not ego. Train smart and you’ll return to overhead work stronger and safer.
Choose the right kettlebell weight for your current level
Pick a weight that lets you finish each circuit with technique intact, not just sweat on your shirt.
Starting points: many women do well around 8 kg and many men near 16 kg. Start with a weight you can control for every rep while keeping your ribs down and your back long.
How to self-test the load
Run one round at a steady pace. Ask yourself:
- Can you hinge, squat, and press without losing brace or heel contact?
- Does the bell pull you to one side or make your head drop?
- Is the third round hard but doable without breaking form?
When to move up
Choose a single lever at a time: add 1–2 reps, cut rest by 10–20 seconds, or increase weight. Move up only when most sets feel smooth and you finish the workout with gas left in the tank.
| Goal | Progress trigger | What you should feel |
|---|---|---|
| More strength | +1–2 reps per set | Same technique, harder finish |
| More endurance | Shorter rest (10–20s) | Stable ribs and steady breathing |
| More load | Next weight up | Smooth reps, no side pull |
For floor-based regressions like the one-arm floor press, pick a weight that lets the triceps touch gently without crashing and keeps the shoulder packed. Progress smart and your training will reward you.
Two beginner-friendly ways to structure your week
Set a simple weekly template and watch steady gains without overthinking.
Option A: Three-day circuit (Mon/Wed/Fri)
Schedule: run the circuit Monday, Wednesday, Friday. Keep the same reps each session.
Focus on clean reps and crisp movements. Trim 10–15 seconds of rest when technique holds.
Option B: Four-week rep wave or time-based formats
Rep wave: Week 1, 8 reps, Week 2, 10 reps, Week 3, 12 reps, Week 4, 15 reps. Keep the bell and rest steady while you level up reps.
Prefer the clock? Try EMOM: set a rep target each minute for 10–20 minutes and use leftover time to breathe. Or do AMRAP blocks of 10–15 minutes and count clean rounds.
Short-on-time format
Do 40 seconds work / 20 seconds rest for 20 minutes. Cycle through the circuit and keep your hips driving the hinge as fatigue builds.
- Keep one rest day between sessions and move lightly on off days.
- Track reps, rest, and weight so you can nudge one variable weekly.
- Pick the plan that fits your life; consistency beats perfect programming.
| Option | Duration | Goal |
|---|---|---|
| Three-day circuit | ~20–30 minutes/session | Technique + steady strength |
| 4-week rep wave | 4 weeks | Progress reps with same load |
| Clock formats (EMOM/AMRAP/40/20) | 10–20 minutes | Cardio, work capacity, training variety |
Cool down and recovery to keep your back, hips, and shoulders happy
Let your system down gently, the last minutes after training decide how you feel tomorrow. Spend about 5–8 minutes on a simple flow that reduces stiffness and helps muscles reset.
Post-session stretches
Start on the floor with a low back twist. Arms out, knees together; breathe slowly and let the spine unwind.
Move into knee-to-chest holds: 30 seconds each side to ease the hips and glutes.
Finish with child’s pose to lengthen the back and calm your breath.
Breathing, grip care, and readiness
If your shoulders feel worked from pressing or kettlebell overhead positions, add gentle cat-cows and a doorway pec stretch to open the front of your chest.
- Nasal breathing: 1–2 minutes of long exhales to downshift the nervous system.
- Grip care: open and close your hands, stretch forearms, or roll a soft ball across the palm after lots of handle time.
- Walk a few minutes barefoot or in flat shoes to check your feet, reset posture, and feel light on your toes.
| Action | Time | Why it helps |
|---|---|---|
| Low back twist | 1–2 minutes | Relaxes spine after hinges and squats |
| Knee-to-chest | 1 minute | Releases hips and glutes |
| Child’s pose + cat-cow | 2–3 minutes | Opens chest and soothes shoulders |
Rehydrate, eat protein to support muscle repair, and log your sets, reps, and weight. That simple habit tells you when to level up and keeps your form honest next session.
Conclusion
Use smart progressions and simple cues to make steady, pain-free gains week after week.
You now have a compact kettlebell plan that trains major movement patterns and builds strength you feel outside the gym. Keep your head tall, ribs stacked, and heels down so your hips and legs drive the work while core and muscles organize the lift.
Start with a weight you control, nail the press regressions if needed, and run this routine two to three times per week. Progress by adding a couple reps, trimming rest, or moving up when form holds.
Pick your schedule, set a timer, and get one clean workout in today. Small, consistent sessions over four weeks will make your swings snappier, your press steadier, and your movement easier to trust.
FAQ
How do I choose the right kettlebell weight to start?
Pick a weight that lets you maintain solid form for 8–12 controlled reps of a goblet squat and 10–15 hip hinges (swings). For many men that’s often 18–24 kg (40–53 lb); for many women 8–12 kg (18–26 lb). If you can’t keep a neutral spine or your core and breathing break down, drop down a size. Do a quick self-test: with the kettlebell in rack position press it overhead once, if you wobble or flare your ribs, the bell is too heavy.
What grip and hand position should I use when I hold the kettlebell?
Hold the handle with a firm but not death-grip. For goblet work use the horns so the bell sits by your chest. For swings and hip-driven moves use a two-handed wrap; for presses and rows use a neutral or single-hand grip on the handle. Keep your wrists stacked over your forearms and thumbs wrapped around the handle to protect the elbow and shoulder.
How do I set up the rack position safely?
Clean the bell to the rack so the bell rests against your forearm and chest, not hanging off your wrist. Stand tall with a proud chest, braced core, and neutral spine. Tuck your ribs slightly, don’t flare. Keep the elbow close to your body and the shoulder packed (down and back) to avoid shrugging.
What’s the simplest way to learn the kettlebell overhead press?
Start strict: press from the rack with your feet hip-width, core braced, and glutes slightly engaged. Drive the bell straight overhead until your elbow is locked and the bell sits over your mid-foot. Avoid arching the low back, think rib tuck and a tall neck. If pain or limited mobility appears, regress to a 90-degree press or a one-arm floor press.
How many reps, sets, and rest should I use as a beginner?
A solid starting template is 3 rounds of 8–12 reps per strength move (goblet squat, strict press, split-stance row) with 30–60 seconds rest between sets. For conditioning, use circuits or 40/20 intervals for 12–20 minutes. Progress by adding reps first, then reducing rest, then increasing weight.
Which movement patterns should I master before adding more reps or weight?
Prioritize the hinge, squat, press, row, and rotation. Nail foot position, knee tracking, hip drive, and a neutral spine from head to heels. Once those patterns feel automatic and pain-free, you can safely increase load or volume.
How do I keep my hips driving the swing instead of my arms?
Think of the swing as an effective hip hinge: load by pushing your hips back, then drive the hips forward to create momentum. Arms act as levers and guides, keep them relaxed and straight but not actively pulling. Squeeze your glutes at the top and maintain a braced core to protect your back.
What are safe regressions if overhead pressing hurts my shoulder?
Try pressing to a 90-degree elbow bend and holding the position. Use a one-arm floor press to limit shoulder range while building strength. Improve T-spine and shoulder mobility with halos, band dislocates, and thoracic rotations before returning to full overhead work.
Can I get cardio and strength in the same session with one bell?
Yes. Kettlebell training blends strength, power, and conditioning. Use circuits or EMOM/AMRAP formats combining swings, squats, presses, and rows to raise heart rate while building muscle. Keep form tight, intensity shouldn’t compromise alignment.
How often should I train per week as a beginner?
Two to three focused sessions weekly is a smart start. Option A: three-day circuit (Mon/Wed/Fri). Option B: a 4-week progression that gradually increases reps or time. Allow at least one rest or active-recovery day between sessions.
What quick warm-up should I do to protect my shoulders, T-spine, and hips?
Spend five minutes on a flow: arm circles, cat-cows, hip-flexor to hamstring stretches, bodyweight squats, and glute bridges. Aim to raise joint temperature and movement quality rather than hold long static stretches.
How do I track progress without always increasing weight?
Track reps, sets, reduced rest, cleaner technique, and time-under-tension. Move from 8 → 12 reps, shorten rest, then add weight. Use variations like split-stance rows or chest-loaded swings to increase difficulty without changing bell size.
Are kettlebell swings safe for the lower back?
Yes when done with a proper hip hinge, neutral spine, and braced core. Avoid squatting the swing or using the arms. If you feel sharp pain, stop and reassess technique or regress to lighter loads and hinge drills.
What are easy substitutions if I don’t have overhead mobility?
Swap strict presses for floor presses or 90-degree holds. Use chest-loaded swings or halos to maintain shoulder-friendly loading. Work on T-spine rotations and banded shoulder drills between sessions.
How should I cool down and recover after a kettlebell session?
Do gentle mobility work: low-back twists, knee-to-chest, and child’s pose. Breathe diaphragmatically to lower heart rate and loosen your grip with forearm stretches. Rest, protein-rich meals, and sleep help muscles rebuild so you’re ready for the next workout.