Resistance Band Chest & Triceps Workout: Tone Up Anytime, Anywhere
Published
Ever feel like getting stronger is locked behind a gym membership? I’ve been there. A fantastic chest and triceps workout with bands changed everything for me, it’s the key to building real upper body power right from your living room floor.
I remember staring at those rubber loops, totally overwhelmed. But here’s the truth: they’re incredibly simple yet brutally effective tools. We’re going to use them to carve definition and boost functional strength, no heavy bench required.
My goal is to cut through the fitness noise. Whether you’re just starting out or you’re a seasoned athlete looking for a fresh challenge, this routine meets you where you are. We’ll focus on proper muscle engagement so every rep counts.
Let’s grab those bands and get ready to work through the routine. You will build strength and work your chest and triceps, and it’s easier to start than you think.
Key Takeaways
- You can build serious upper body strength and muscle definition using only resistance bands.
- This approach is perfect for beginners and advanced athletes alike, offering scalable difficulty.
- Training at home eliminates common barriers like gym intimidation and commute time.
- Proper form and muscle engagement are crucial for maximizing results and preventing injury.
- Resistance bands provide constant tension, which can lead to effective muscle growth.
- This method simplifies fitness, making consistent progress truly accessible for everyone.
- You can achieve a complete, effective session targeting major pushing muscles in a short time.
Why Use Resistance Bands for Chest and Triceps Workouts?
I used to think real muscle building required heavy iron and a crowded bench. Then I discovered the power of portable resistance. These tools deliver serious results without the bulk.
Benefits of Dynamic Tension and Mobility
Resistance bands create linear variable resistance. Tension increases as you stretch them. This forces your muscles to work harder at the top of each repetition.
You keep muscles under constant stress. This approach also promotes better mobility and joint health.
Portability and Versatility for Home and Travel
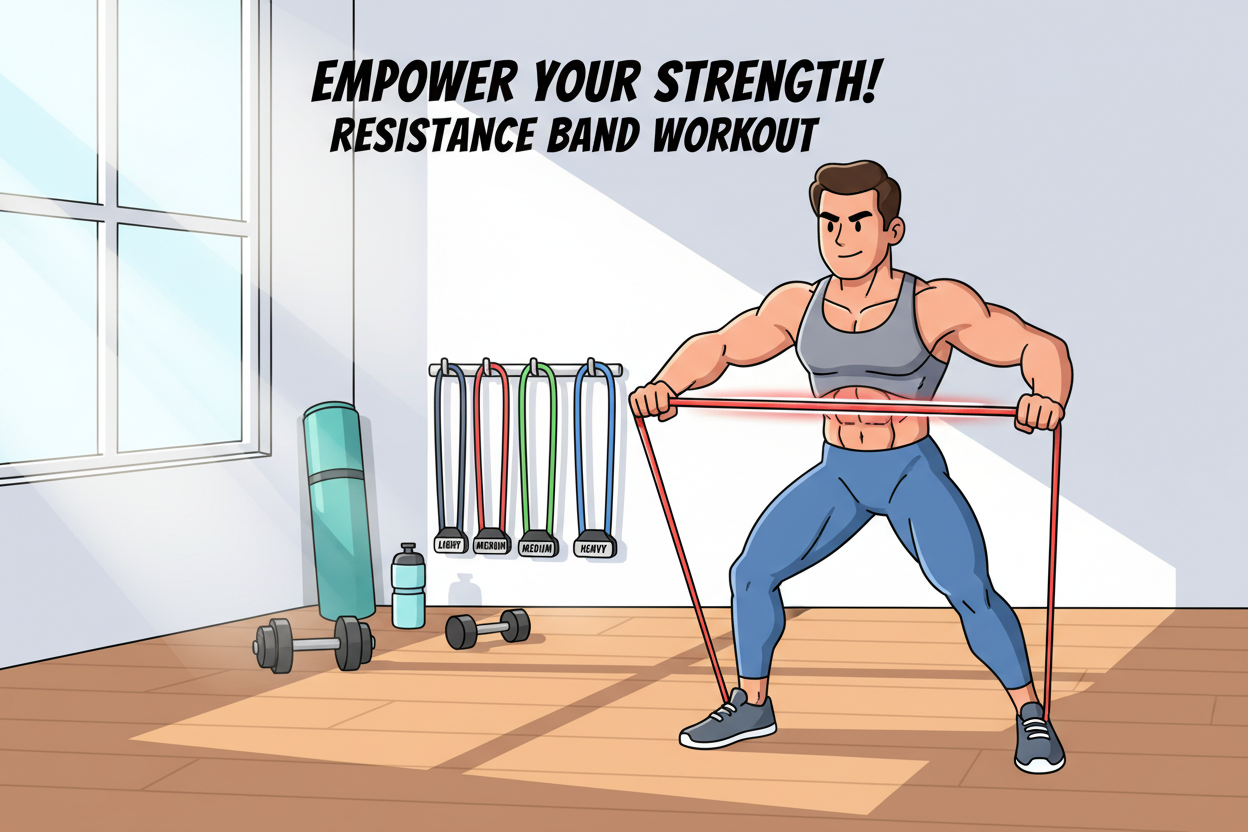
A set of loop bands fits in any bag, so you never need to skip a session.
These loops are incredibly versatile. They target all three heads of the triceps for complete development. Your upper body regimen fits in a small bag.
| Feature | Traditional Weights | Resistance Bands |
|---|---|---|
| Portability | Low; bulky and heavy | High; lightweight and compact |
| Tension Type | Constant gravity-based | Variable; increases with stretch |
| Joint Stress | Higher impact on joints | Lower; smooth, adaptable resistance |
| Setup Time | Longer; requires rack and bench | Instant; anchor and go |
| Cost | High initial investment | Affordable and scalable |
This routine simplifies fitness. You can achieve a complete, effective session anywhere.
Essential Resistance Band Equipment for Your Routine
Let’s talk gear, the simple setup that makes this whole effective routine possible. Having the right tools prevents frustration and sets you up for real progress.
Choosing the Right Band for Your Strength Level
The core rule is simple: match the band to your current ability. This is the foundation for safe, effective training. Bands are beautifully scalable.
I recommend starting with three specific levels. This covers everything from heavy pushes to warm-ups.
| Band Name | Resistance | Length | Best For |
|---|---|---|---|
| HAF Band | Heavy | 5 feet | Heavy pressing movements |
| Strength Band | Medium | 6.5 feet | All-purpose accessory exercises |
| Mobility Band | Light | 4 feet | Warm-ups and joint mobility |
Start with a band you can control perfectly. You can always grab a thicker one later. This method lets you safely progress without risking your joints.
Setting Up Your Home Gym for Effective Training
The key to an effective home session isn’t fancy equipment; it’s a solid, immovable anchor point. Getting this right is the difference between a safe, productive routine and a frustrating, or risky, experience.
Finding Secure Anchor Points
I look for anything that won’t budge. A sturdy power rack or a solid vertical pole is perfect. At home, a heavy door frame or a robust piece of furniture can work wonders.
Always test your anchor before you begin. Give it a firm tug. If it moves, find something else. Your safety depends on this simple check.
Positioning is everything. Where you attach the band dictates the angle of resistance. This directly targets the intended muscle groups in your upper body.
Your distance from the anchor changes the game. Step closer for less tension, step back for more. This instant adjustment lets you control the difficulty of every rep.
This setup turns any space into a personal training zone. It’s the foundation for consistent, injury-free progress.
A Chest and Triceps Workout With Bands
This is where progress happens, turning simple loops into a complete, muscle-engaging session. Let’s talk about execution.
We’ll target every major pushing group in your upper body. The goal is joint-friendly strength and real growth.
Focus on high-quality repetitions. Feel the tension work through your entire range of motion. Control is your new best friend.
I want you to tackle the mind-muscle connection. Squeeze hard at the peak of every rep. This maximizes effectiveness.
| Exercise Principle | Execution Tip | Why It Works |
|---|---|---|
| Full-Body Engagement | Keep shoulders down, core tight. | Protects joints and builds functional strength. |
| Controlled Reps | 2 seconds up, 3 seconds down. | Increases time under resistance for better growth. |
| Mind-Muscle Connection | Visualize the target muscles working. | Improves neural drive and muscle activation. |
| Adjustable Intensity | Step back from the anchor for more challenge. | Allows progressive overload without new equipment. |
This routine is challenging but sustainable. Listen to your body. Adjust by moving your feet or swapping bands.
Resistance Band Chest Exercises to Sculpt Your Upper Body
Now we get to the fun part, applying your setup to exercises that truly sculpt your physique. This focus is on building a strong, defined upper torso.
We’ll combine effective compound movements with precise isolation drills. Each one targets your pushing muscles from a unique angle.
Banded Bench and Floor Press Techniques
I love the banded floor press. It builds serious pressing strength while being gentle on your joints. Aim for 4-5 sets of 12-20 reps.
For a core challenge, try the v-up banded press. It fires up your midsection while you push. Start with 3-4 sets of 8-12 reps.
Remember to squeeze hard at the top of every repetition. This pause maximizes the tension for better growth.
Isolating Your Chest Muscles with Flys and Pullovers
Flys are perfect for isolation. Keep your shoulder blades pulled back during the movement. This ensures your front delts don’t take over.
The banded pullover is a hidden gem. It targets your serratus anterior and offers a deep stretch. Perform 3 sets of 15-20 reps for the full effect.
| Exercise | Primary Focus | Recommended Sets & Reps | Key Tip |
|---|---|---|---|
| Banded Floor Press | Overall pressing strength | 4-5 sets of 12-20 reps | Pause at the top to maximize tension |
| V-Up Banded Press | Core integration & pressing | 3-4 sets of 8-12 reps | Maintain a tight core throughout |
| Banded Chest Fly | Chest isolation | 3-4 sets of 12-15 reps | Retract shoulder blades |
| Banded Pullover | Serratus anterior & stretch | 3 sets of 15-20 reps | Feel the full stretch at the bottom |
Resistance Band Triceps Exercises for Arm Strength and Definition
Building sleeve-busting definition starts with targeted triceps work. This muscle group is crucial for finishing every push with power.
I love how these tools provide constant tension. They force your arms to work through the entire range of motion.
Overhead Extensions and Pushdowns
Overhead extensions are fantastic for the long head of the muscle. Keep your elbows pointed forward throughout the movement.
For pushdowns, anchor your band high. Always keep your elbows tucked tightly to your sides.
This ensures the tension stays right where you want it. Try band pull-aparts for the upper back for endurance, aim for 2 sets of 20-30 reps.
Single-Arm Variations and Finishers
Single-arm extensions are my go-to for fixing imbalances. Start with your weaker side and match reps with the stronger one.
The triceps finisher complex works well at the end of a session. Perform 9 extensions, 9 eccentric presses, and 9 close grip presses back-to-back.
For banded dips, focus on hitting a 90-degree elbow angle. This fully engages the muscle before you push back up.
| Exercise | Primary Focus | Recommended Sets & Reps | Key Form Tip |
|---|---|---|---|
| Overhead Extension | Long head development | 3 sets of 12-15 reps | Elbows forward, slow lowering |
| Pushdown | Overall triceps mass | 3-4 sets of 15-20 reps | Elbows locked at sides |
| Single-Arm Extension | Correcting imbalances | 2-3 sets of 10-12 reps per arm | Control the band’s return |
| Triple Trize Complex | High-volume finisher | 1-2 rounds of 9 reps each | Minimal rest between movements |
These movements build incredible arm strength. Remember, quality always beats quantity.
Modifications for One-Sided and Increased Band Resistance
I struggled with a weaker left side for years until I learned these simple adjustments. Fixing imbalances isn’t just about looks, it builds functional, resilient strength.
Focusing on one side at a time changed everything. I perform single-arm presses to ensure my dominant side doesn’t cheat. This isolation lets the lagging muscle catch up.
Increasing the resistance is straightforward. Step further from your anchor or fold the band in half. Both methods boost tension instantly.
| Modification | Method | Key Benefit | Safety Check |
|---|---|---|---|
| Single-Arm Focus | Use one handle, anchor band centrally. | Corrects muscle imbalances effectively. | Keep core tight to prevent rotation. |
| Step-Back Increase | Move feet away from anchor point. | Adds linear variable resistance. | Stop if form breaks down. |
| Band Fold | Double the band over itself. | Doubles tension for heavy sets. | Ensure anchor is extremely secure. |
When you ramp up the resistance, never sacrifice clean technique. Control matters more than the heaviest band.
These tweaks let you customize every session. For a full roster of movements, check out these best resistance band exercises for arms.
You can always find a way to challenge your muscles. Smart modifications fuel consistent growth.
Integrating Bodyweight and Band Workouts for Balanced Strength
Your push-up game is about to level up dramatically by adding one simple element: a resistance band. I found that blending these two methods builds a more complete, resilient type of power.
Combining Banded Push-Ups with Traditional Moves
Wrap the band across your upper back and secure it under your palms. This adds serious tension as you push up.
Your muscles must work much harder at the top of the movement. It increases tension and promotes steady growth in your upper body.
For a targeted burn, try close-grip push-ups in this style. I recommend 3 sets of 8-12 reps to start.
Here’s my favorite finisher. Complete your banded set, then immediately drop the band and max out with bodyweight reps.
This burnout shocks your chest and triceps for new growth. Always keep your core braced to protect your spine.
This integration develops both raw strength and precise control. Your workouts become balanced and highly effective.
Techniques for Maximizing Tension and Muscle Activation
Maximizing every repetition comes down to two key principles: intentional squeezing and smart adjustments. I learned that small tweaks in technique can dramatically increase the effectiveness of your session.
These methods ensure every ounce of effort translates into real growth. Let’s dive into how to apply them.
Mastering Squeeze and Hold at Peak Contraction
The key to deep muscle activation is a strong squeeze. Hold that peak contraction for a full second.
Really feel your chest and triceps working. This pause maximizes the tension, telling your body to grow.
I focus on this during every pressing movement. It turns a simple rep into an effective stimulus.
Adjusting Band Position and Resistance Gradually
Don’t be afraid to move your anchor point. A higher or lower position shifts the angle of resistance.
I always increase resistance slowly. This lets your tendons adapt without unnecessary aches.
Focus on the quality of each movement. Slow, controlled reps lead to better growth than fast, sloppy ones.
Pay close attention to your body position. It directs the tension exactly where you want it for a more effective routine.
Tips for Controlling Form and Preventing Injury
Let’s get real: proper technique is your shield against injury. I learned this through trial and error. Controlling your form is the best way to stay safe and make gains.
Keep your shoulder blades pulled back and your core tight throughout your entire training. This creates a stable base for every movement.
If you feel your arms swinging or your body bouncing, you’re using momentum. Slow down and reset your position immediately. Focus on using your muscles, not throwing your weight around.
I always remind myself that the resistance is there to help me grow. It should never force me into a painful or unnatural position for my joints.
If your band feels too heavy, switch to a lighter one immediately. Maintaining perfect form is the real key to long-term progress and health.
Listen to your body closely. If you feel any sharp pain in your shoulder or elbows, stop the movement. Adjust your setup and try again with better control. The resistance from the band is a tool, you are in charge of how you use it.
Always test your anchor point before you begin. A secure band means a safe and effective session. Your future self will thank you for this discipline.
Incorporating Progressive Overload with Resistance Bands
I used to hit a frustrating plateau every few weeks until I discovered the simple key of progressive overload with my bands. Getting stronger demands that you consistently ask a little more from your muscles. This principle is the engine of real growth.
Here’s how I apply it. First, I aim to add more reps once I hit the top of my target range. If I can smoothly complete all my sets, I know it’s time for a thicker band.
Tracking everything in a basic notebook changed the game for me. Seeing the numbers climb shows exactly when I’m ready to increase the resistance. It turns guesswork into a clear plan.
You can also ramp up intensity without new gear. Simply shorten your rest periods by 15 seconds between sets. This small change creates an effective new challenge.
Consistency is the true foundation. Keep showing up and pushing that tiny bit further than last time. Remember, even small improvements in your strength stack up into massive changes over weeks and months.
Sample Home Workout Routine Using Resistance Bands
Here’s a straightforward template you can follow today to start building muscle at home. This plan turns everything we’ve covered into a single, effective session.
It’s a plug-and-play template. Feel free to swap exercises as you get more comfortable with your equipment.
Workout Structure for Beginners
If you’re new, start with two sets per exercise. Use lighter loops to master your form perfectly.
Focus on control before increasing intensity. This builds a safe foundation for your training.
Steps for Intermediate Lifters
Follow the full structure of three sets per exercise. Slowly add reps until you hit the top of your range.
Then, upgrade to a thicker band. This method ensures consistent progress without plateaus.
We’ll start with a compound pushing movement. Move into focused isolation, and finish with a high-rep burnout.
This hits every muscle group effectively. Always rest 45 to 60 seconds between your sets.
This maintains energy for high-quality form. For a comprehensive plan, explore this full-body resistance band workout routine.
Conclusion
Training with resistance bands proves that real strength isn’t about location, but dedication. We’ve covered everything you need to sculpt a strong chest and defined triceps by utilizing these simple tools and your dedicated effort.
Remember, progress happens through consistency. Show up each week and apply those progressive overload principles. Your consistent effort compounds into remarkable, tangible change.
I’m genuinely proud of you for starting. You have all the knowledge to reach your goals anywhere. If you ever feel unsure, revisit this guide.
Keep pushing forward. Stay focused on your form. Your power is built one solid rep at a time, no matter where you train.
FAQ
Can I really build upper body strength just using resistance bands?
Absolutely! I was skeptical at first, too. The key is the dynamic tension bands provide, the further you stretch them, the harder the movement gets. This constant challenge throughout the entire range of motion is fantastic for building muscle and strength. By choosing the right band resistance and using techniques like progressive overload, you can absolutely sculpt an effective upper body.
What’s the best way to set up for exercises like a band press at home?
Finding a secure anchor point is everything for moves like presses and extensions. I always recommend using a sturdy door anchor, just make sure it’s closed and locked! You can also loop the band around a solid post or the leg of a heavy couch. The goal is to create a stable base so all the tension goes into your muscles, not into worrying about the setup.
Which single exercise with bands is most effective for the back of my arms?
For really targeting those triceps, the overhead extension is a big help. It isolates the muscle beautifully. Stand on the center of the band, grab each end with your hands, and press your arms straight overhead. Then, slowly bend your elbows to lower your hands behind your head. That peak squeeze at the bottom? That’s where progress happens for arm definition.
How do I make a band workout harder as I get stronger?
This is my favorite part about training with bands! You have a few awesome options. First, you can simply switch to a thicker band with more resistance. Second, you can combine bands for even more challenge. Third, focus on your form: slow down the movement, add a pause at the point of peak tension, or increase your reps and sets. This gradual increase is how you keep making gains.
I only have one band. Can I still do a complete routine?
Yes, you totally can! One band is a perfect place to start. You can adjust your body position to change the difficulty. For example, in a press, widening your stance on the band creates more tension. You can also focus on single-arm variations, which not only challenge stability but also help identify and correct any strength imbalances from one side to the other.
How do I protect my shoulders and joints during these workouts?
Form is your best friend here. I always remind myself to keep my shoulder blades pulled down and back, never let them hunch up! For moves like flys or pushdowns, maintain a slight bend in your elbows and control the movement both out and back. Avoid “snapping” the band. If you feel strain in a joint, check your position or lighten the resistance. Listening to your body is the smartest training move you can make.